Quick answer
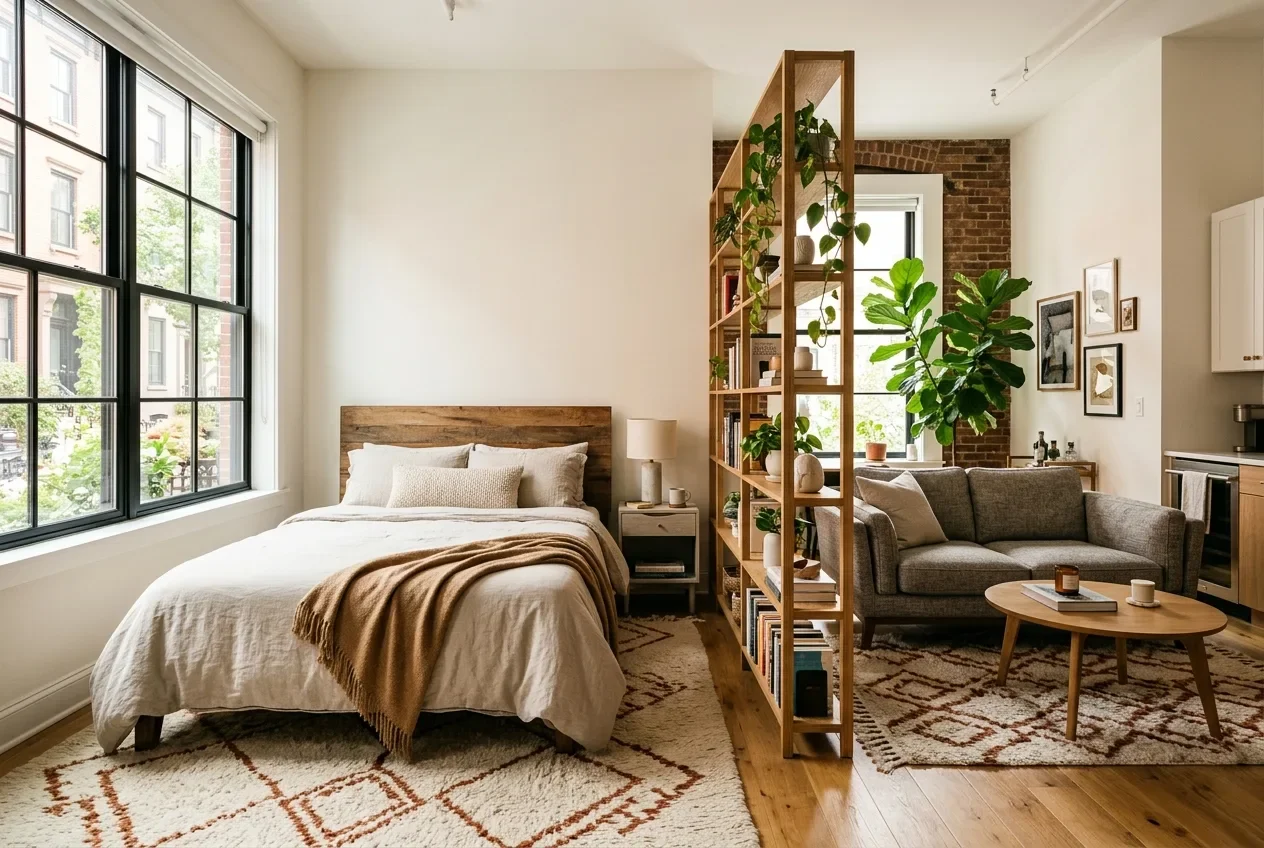
Create separate zones in a studio apartment by using rugs to anchor spaces, positioning furniture (like bookcases or sofas) as visual dividers, and using lighting to define different areas for sleeping, living, and working.
Who this is for
This article is for renters living in open-concept studio apartments (typically 350-550 square feet) who are tired of feeling like they sleep in their kitchen and work in their bedroom. If you want structure and separation without violating your lease or spending thousands on custom room dividers, these non-permanent solutions are for you.
What to measure first
Before creating zones, accurately map out your studio:
- The total square footage and the shape of the room (L-shaped studios are naturally easier to zone than square boxes).
- The exact dimensions of your non-negotiable furniture (bed, sofa, desk).
- The location of fixed elements: windows, radiators, the kitchen counter, and electrical outlets.
- Ceiling height, especially if you plan to use tension rods for curtains.
Tip label: Map out a 36-inch continuous path from your front door to the kitchen and bathroom before finalizing any zone dividers.
Defining Your Core Zones
Most studios need three to four distinct zones: Sleep, Lounge, Eat, and Work. You likely won’t have four perfectly equal quadrants. Decide which zone is your priority. If you work from home, a solid desk setup might take precedence over a large dining table.
Start by placing the bed first, as it’s the largest and most private item. Tuck it into an alcove or the furthest corner from the front door. Next, position the lounge area. Ideally, the sofa should not face the bed; facing it away creates an immediate psychological barrier between “active” and “rest” spaces.
Using Furniture as Walls
You don’t need to build drywall to create a barrier. Strategic furniture placement is a renter’s best tool for division.
Open Bookcases: A tall, open-backed bookcase (like the IKEA KALLAX) placed at the foot of the bed or between the bed and sofa acts as a porous wall. It separates the space visually while letting light flow through. The Sofa Back: Simply placing a low console table against the back of a floating sofa clearly delineates where the living room ends and the kitchen or dining space begins. Clothing Racks: A sturdy, good-looking garment rack can block the view of the bed while doubling as closet space.
Visual Dividers: Rugs and Lighting
When physical barriers take up too much room, rely on visual cues.
- Rugs: Use different rugs for different zones. A plush 5x8 rug under the bed and a low-pile 6x9 rug under the sofa instantly signal two separate rooms.
- Lighting: Swap the harsh overhead light for dedicated zone lighting. A floor lamp by the sofa, a task lamp on the desk, and wall-mounted plug-in sconces by the bed create separate spheres of light that define the space at night.
| Divider Type | Best for | Watch out for | Rental score |
|---|---|---|---|
| Bookcase | Maximum separation, storage | Can block natural light | 5/5 |
| Rugs | Tiny studios, clear sightlines | Rugs sliding (use a pad!) | 5/5 |
| Tension rod curtains | Hiding the bed completely | Ceiling height limitations | 4/5 |
Renter-safe cautions
If you choose to use room dividers, ensure they are stable. Tall, narrow bookcases used as freestanding dividers are tipping hazards. While you can’t anchor them to a wall, pack the heaviest items (like books) on the bottom shelves to lower the center of gravity. If using tension rods for curtains, ensure they are securely tightened but not so tight that they damage the drywall or ceiling plaster.
Budget alternatives
- Under $25: A plug-in pendant light on a swag hook to hang over a small dining table, giving that zone a specific anchor.
- Under $50: An extra-long tension rod and a simple linen curtain panel to string across a sleep alcove.
- Under $100: A 4x4 cube organizer to serve as a low-profile half-wall between the bed and the living space.
Common mistakes
- Matching everything: Using the exact same colors and textures everywhere makes the studio feel like one giant blob. Use slightly different, yet cohesive, palettes for different zones.
- Creating a maze: Putting up too many dividers makes a 400 sq ft apartment feel like a 200 sq ft closet. Sometimes, less is more.
- Pushing all furniture to the perimeter: We said it in the living room guide, and it applies here: floating furniture is the key to creating zones.
Recommended product
For separating a studio without building a wall, this no-drill floor-to-ceiling room-divider rod is a relevant product starting point. Confirm the ceiling and floor height range, curtain compatibility, surface pressure, seller, price, and return terms before ordering. Home in Layers has not personally tested this product.
View the no-drill room-divider rod on Amazon (affiliate link)
Related Home in Layers articles
- Small Apartment Living Room Layout Ideas
- How to Choose Apartment Furniture
- How to Decorate a Rental Apartment Without Losing Your Deposit
- The Complete Renter-Friendly Apartment Decorating Checklist
Takeaway
You can give a studio apartment distinct “rooms” simply by angling your furniture correctly, deploying a few strategically placed rugs, and using lighting to draw the eye.
Explore More on Pinterest
Save this guide to your boards or check out our daily small-space styling ideas, renter-safe DIYs, and apartment resets.